Step 1
It's raining a lot on this side of the world, which gave me the inspiration to design a rainy scene. To add some excitement, I decided to create a dramatic, surreal scene. Now it's time to show you how I did this. Since this is an intermediate-advanced tutorial, I'll skip some basic explanations. Let's get it started!First create a new 1440 px by 900 px document. I use this size because that's my screen resolution and I love to keep my designs as wallpapers for a while. Then fill the background with black (#000000).
Step 2
Now let's add one of the main images of the design, a pointing finger, as you can see my original idea was to turn the pointing finger into a snake, and this picture is perfect. Paste it into a new layer named "Hand" and extract the hand from the background (I used the Lasso tool). Next, resize it and place the hand in the bottom left quadrant. Notice that I love using guides, because you can divide your design into areas (four quadrants in this case) and keep your design balanced. Also, you can see the finger tip is in the middle of the design. This is very important because the center of the design must be eye catching.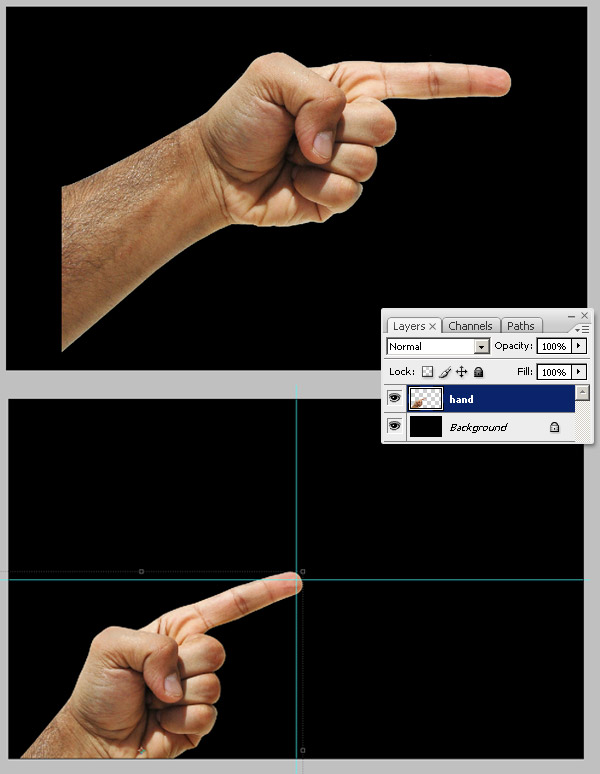
Step 3
Now paste the snake into a new layer named "snake," after hours searching I found this one, which is a beautiful shot, cute but scary. Then, extract the snake from the background.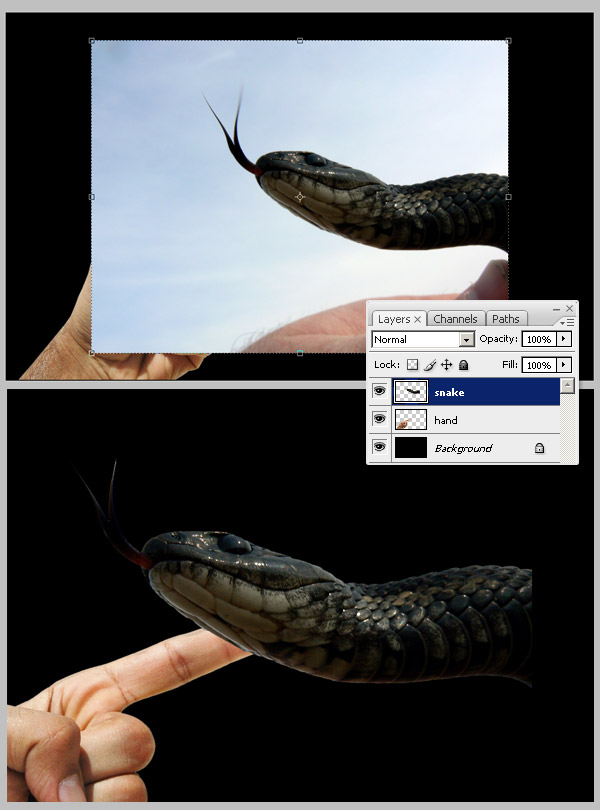
Step 4
Select the snake and go to Edit > Transform > Flip Horizontal, then using the Rectangular Marquee tool make a selection on snake's neck. Select the Move tool (V), click on any corner to activate the Warp options, and warp the selection to make the neck stretch a little bit more. You can use the Liquify filter as well.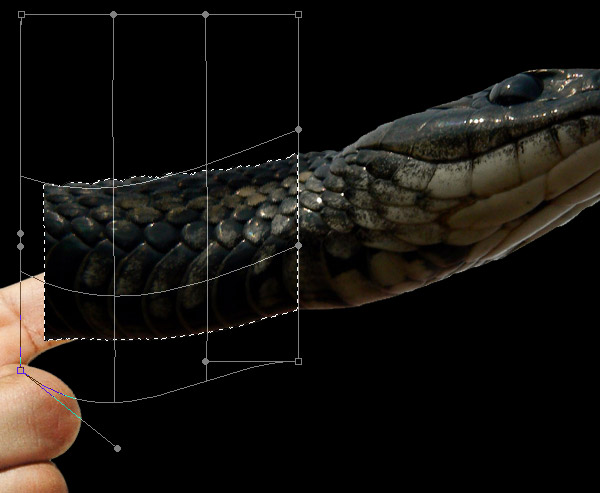
Step 5
Now, place the snake like a prolongation of the finger.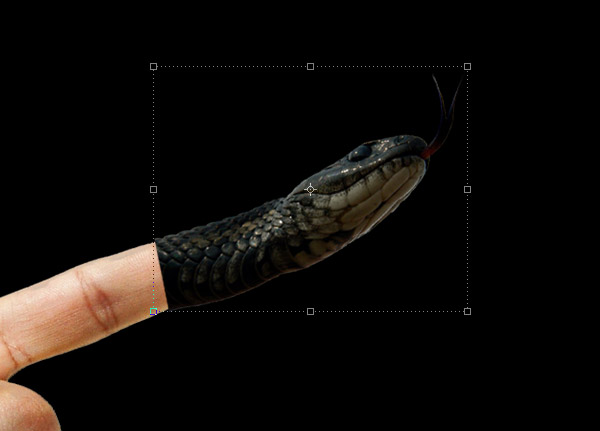
Step 6
As our snake is dark, we'll increase the lights by adjusting the Levels as follows.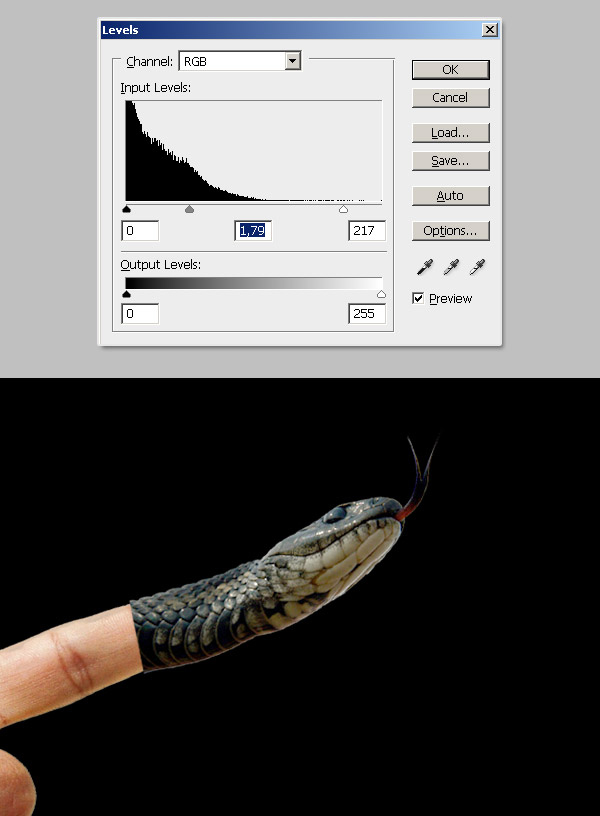
Step 7
Now select the Clone Stamp tool and clone the snake skin. The trick is change the Angle value, on Clone Source window, from 0º to different angles to match the hand shape. Also, you can check Show Overlay option to make your work faster. Let's start setting the angle to -5º. Try not to paint outside of the hand shape, but if you make a mistake you can fix it by using the Eraser tool. Besides if you have any doubt about using the Clone Stamp tool, take a look at "Useful Applications for the Clone Stamp Tool."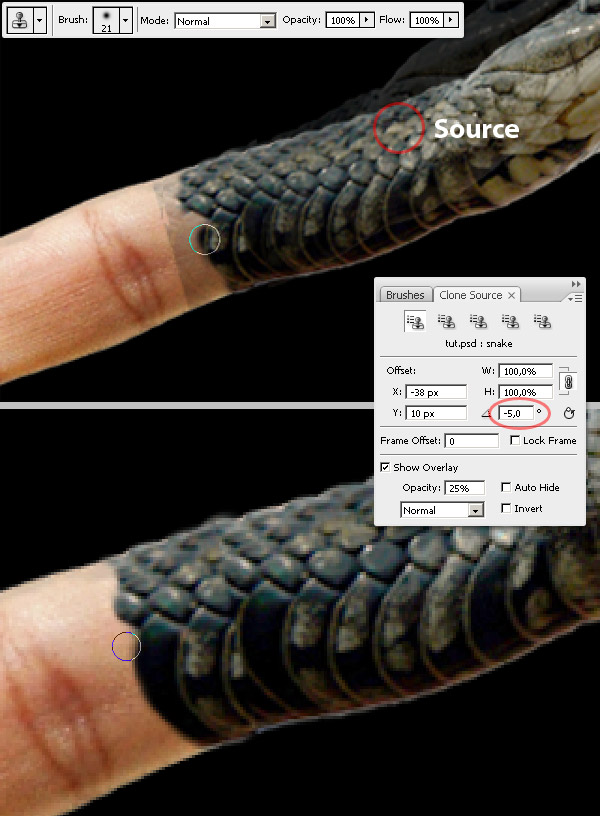
Step 8
Then using a soft Eraser (Opacity and Flow 50%) delete some areas of the cloned zone.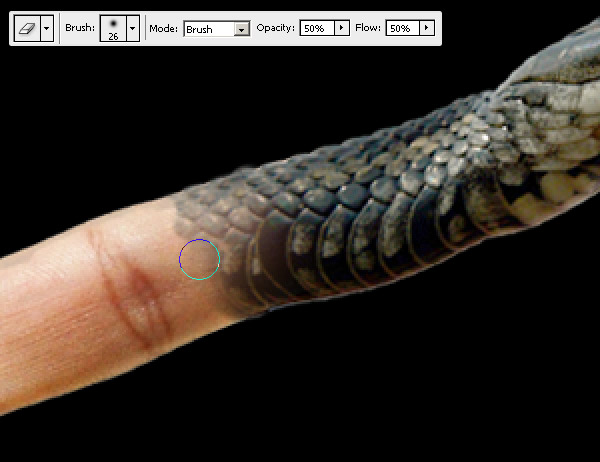
Step 9
Clone the snake skin once more, but this time across a bigger zone over the finger. Next, use a soft Eraser again to delete some areas of the snake skin.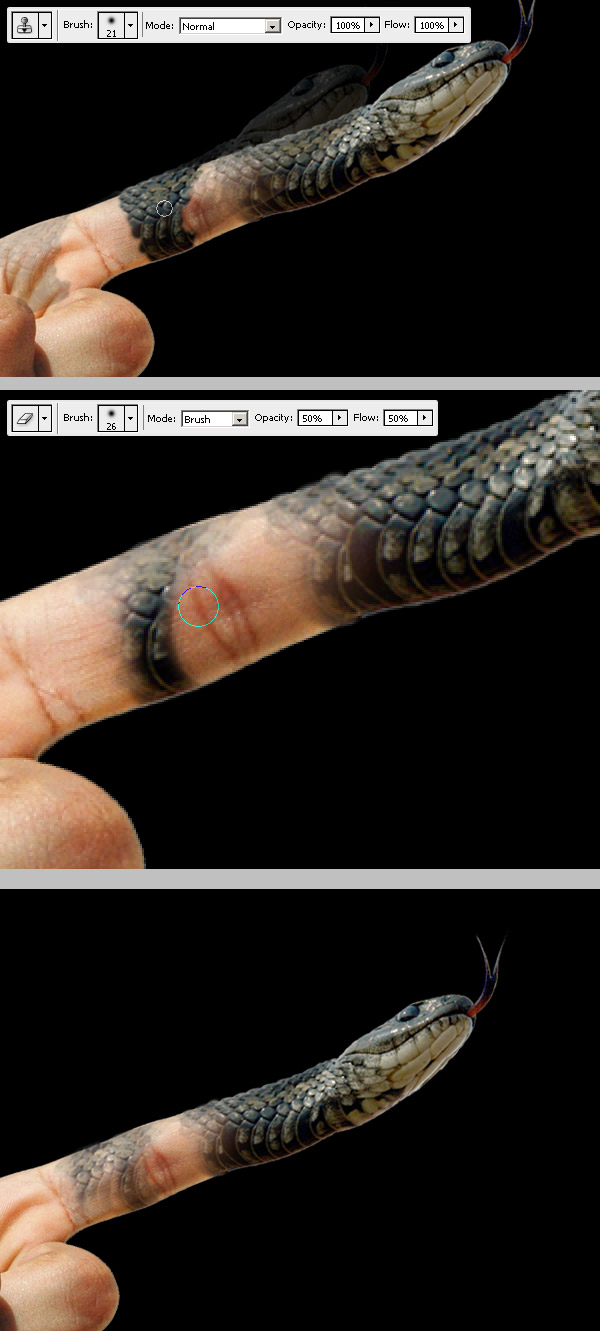
Step 10
Now, we're going to clone more snake skin over the hand. To increase the level of realism you can rotate the cloning source some degrees to match perfectly with the hand's shape. Then delete a little bit of the snake skin.
Step 11
Select the "Hand" layer and adjust the Hue/Saturation as follows to get a green tone on the skin. You can use an Adjustment Layer if you want to.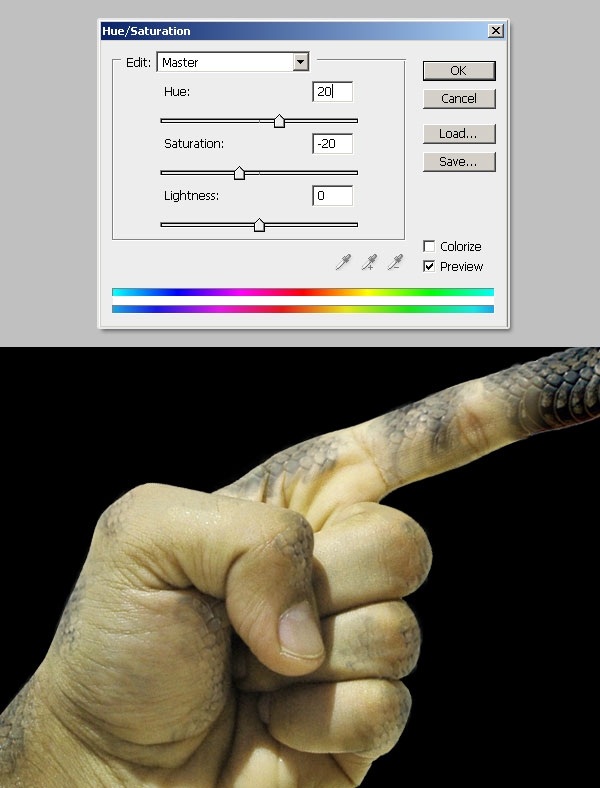
Step 12
Next, paste the background image, in this case this picture of dark clouds, name the layer "Clouds."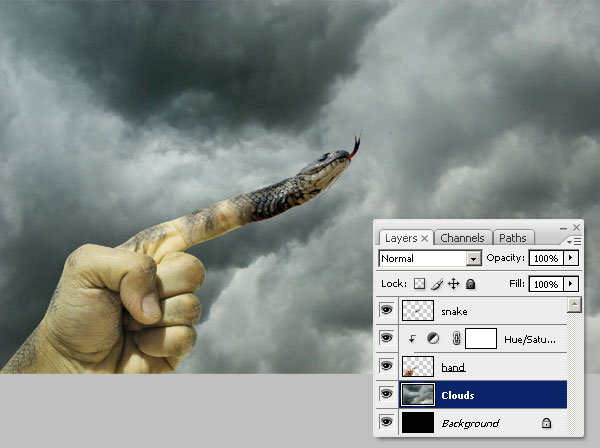
Step 13
With the Burn tool and a soft brush - Exposure 50%, burn some areas of the "Hand" layer to create dramatic shadows, nevermind the lights by now, we'll take care of them later.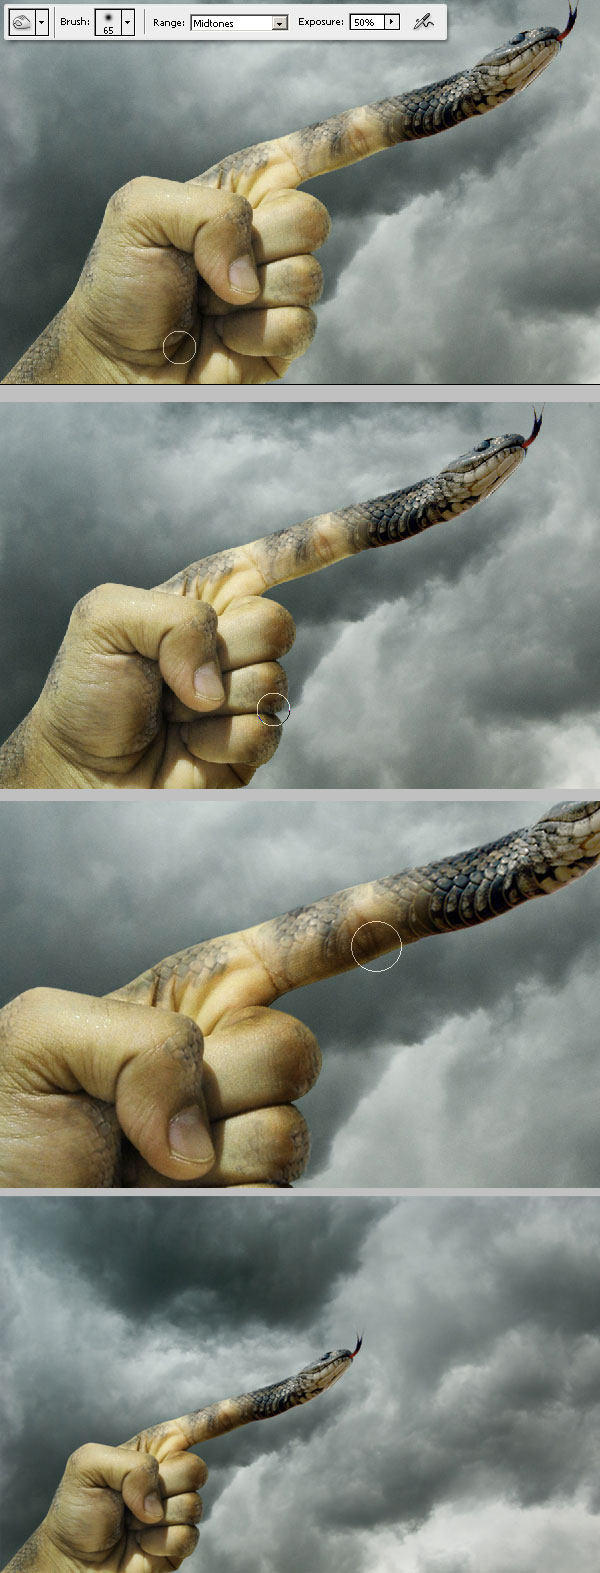
Step 14
Now paste this image of a flying crow, then extract it from its background and place it in the top right quadrant to keep the balance.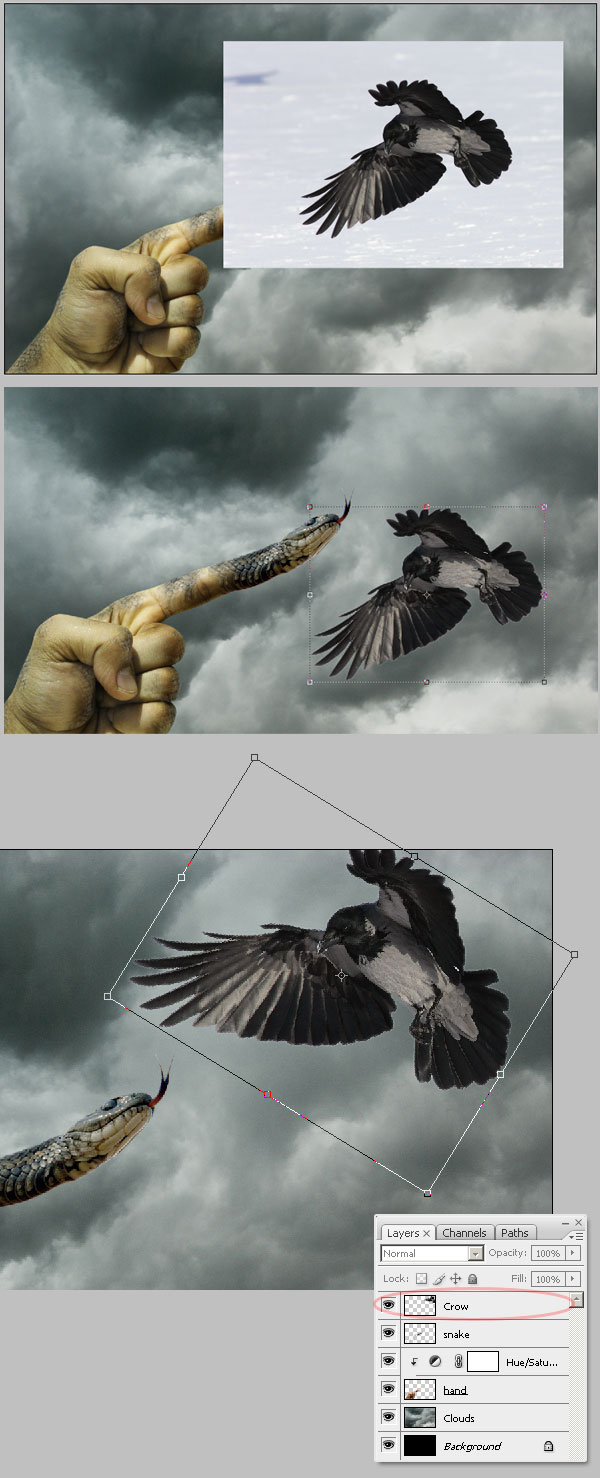
Step 15
Burn and Dodge the crow to match the scene lightening, specially add more light to the wings. At this point we've got the scene complete, next we'll add the details.
Step 16
Next we're going to add some motion blur to the crow's wings, for this duplicate the "crow" layer and go to Filter > Blur > Motion blur, set the angle to -30 or -31 degrees and hit OK. Next, on the layers palette, move the "crow copy" layer below the "crow" layer, and then with a soft Eraser delete everything but the blurred wings and tail on the "Crow copy" layer.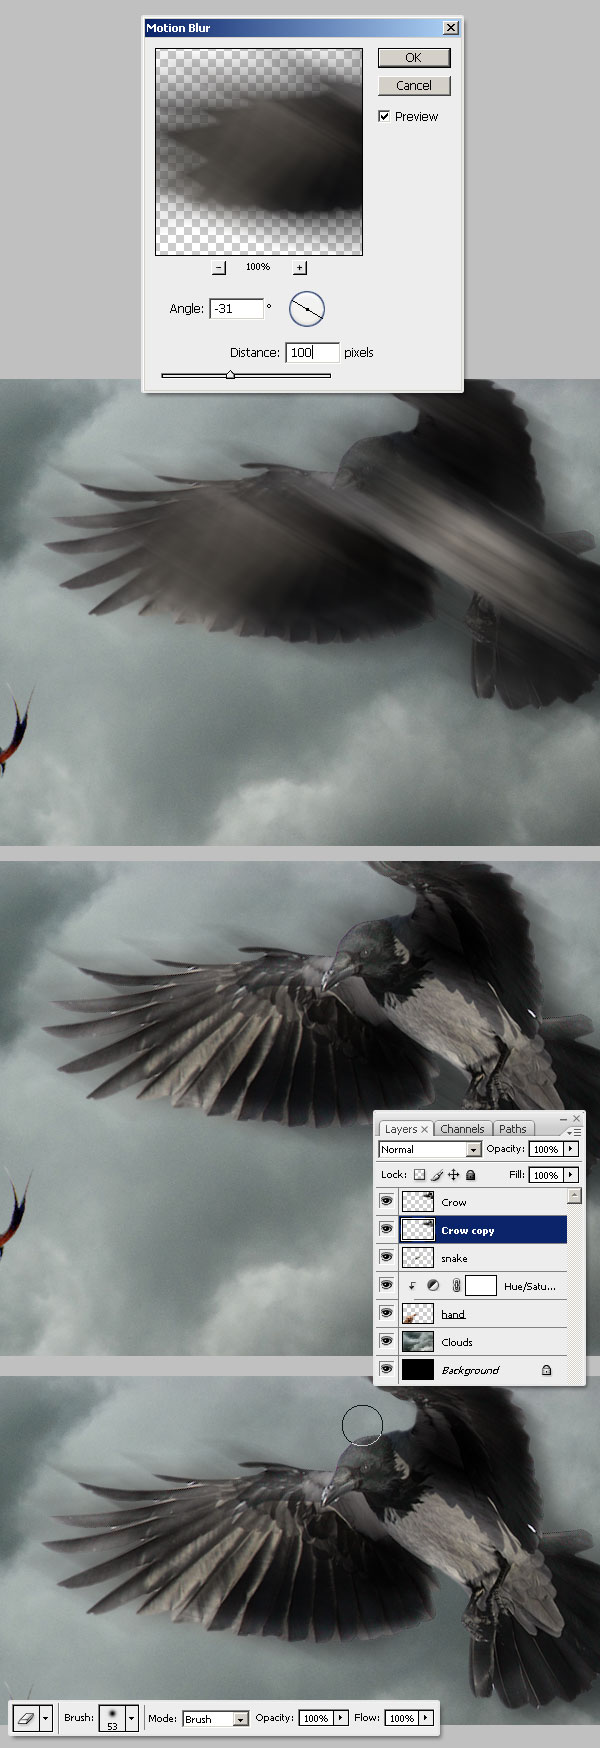
Step 17
Repeat the same process as the previous step, but this time on a small copy of snake's head. This way you'll add some motion blur effect to snake's tongue.
Step 18
Next adjust the Levels of the "Clouds" layer to make the clouds darker.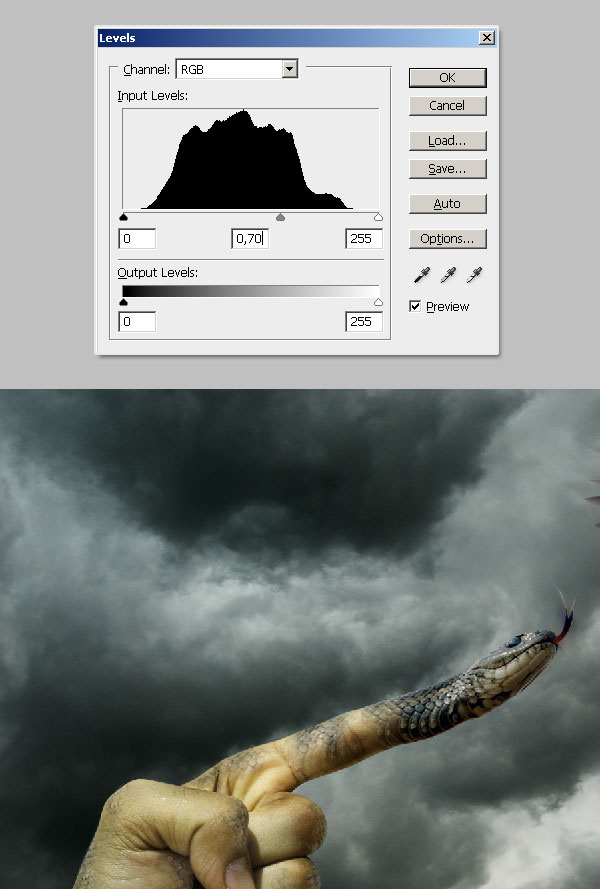
Step 19
Following, paste this picture of lightning bolts into a new layer called "Bolts" over the "Clouds" layer. Create a feather selection and try to get only the bolts after deleting the sky on the "Bolts" layer (see the image below). Don't worry if the selection/extraction isn't perfect, we'll fix it in the next step.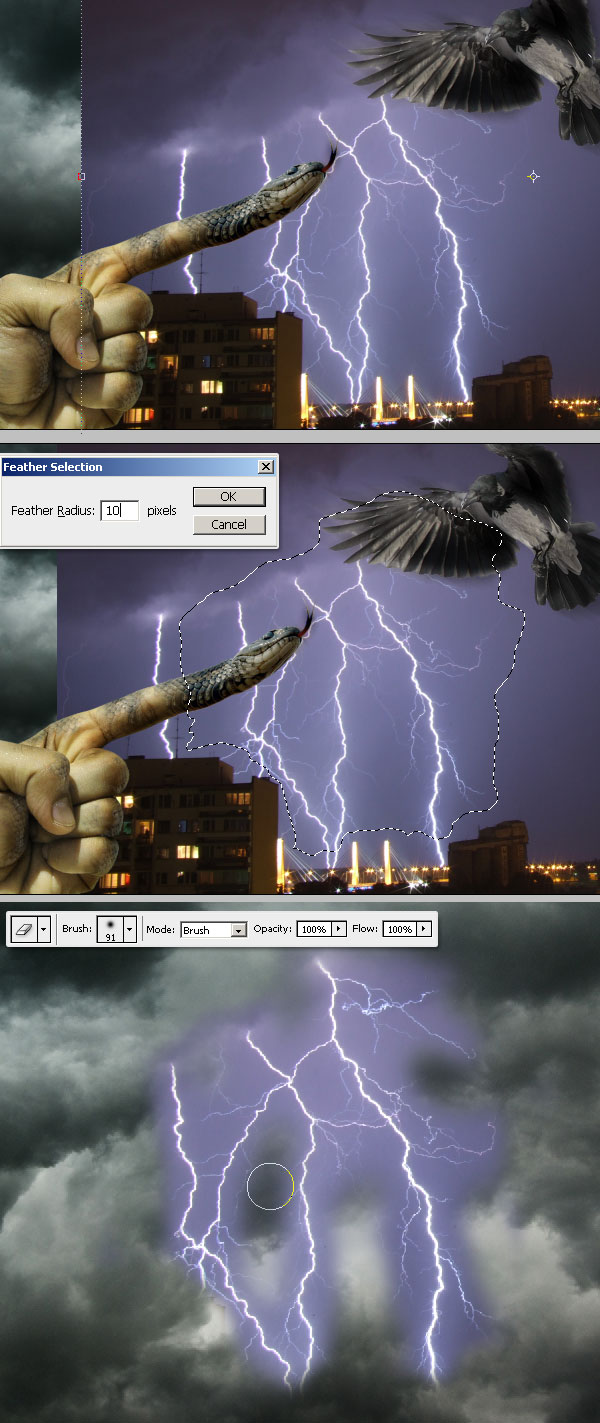
Step 20
Sometimes, to avoid a complex extracting process you must play with color adjustments and several blending modes. The lightning in the picture is a good example. Push down the Saturation of the "Bolts" layer to -100 and change its Blending Mode to Vivid Light.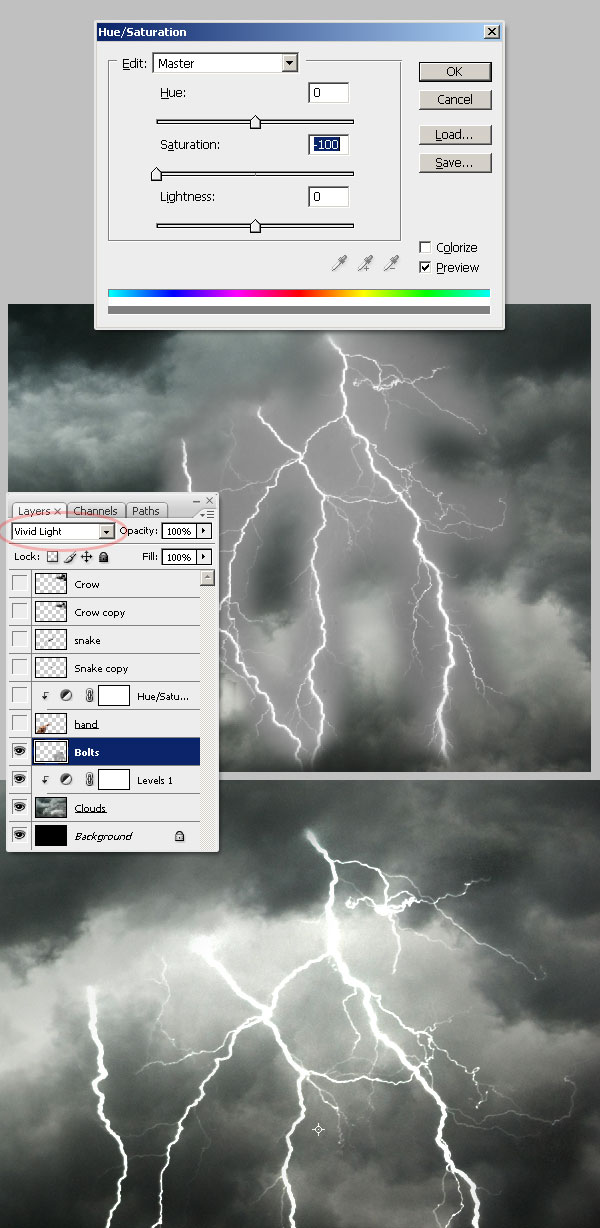
Step 21
Now create a new layer above everything and name it "Lights", change its Blending Mode to Overlay, and paint some white highlights on it, especially on the borders of our main shapes (hand and crow) and over the bolts as well.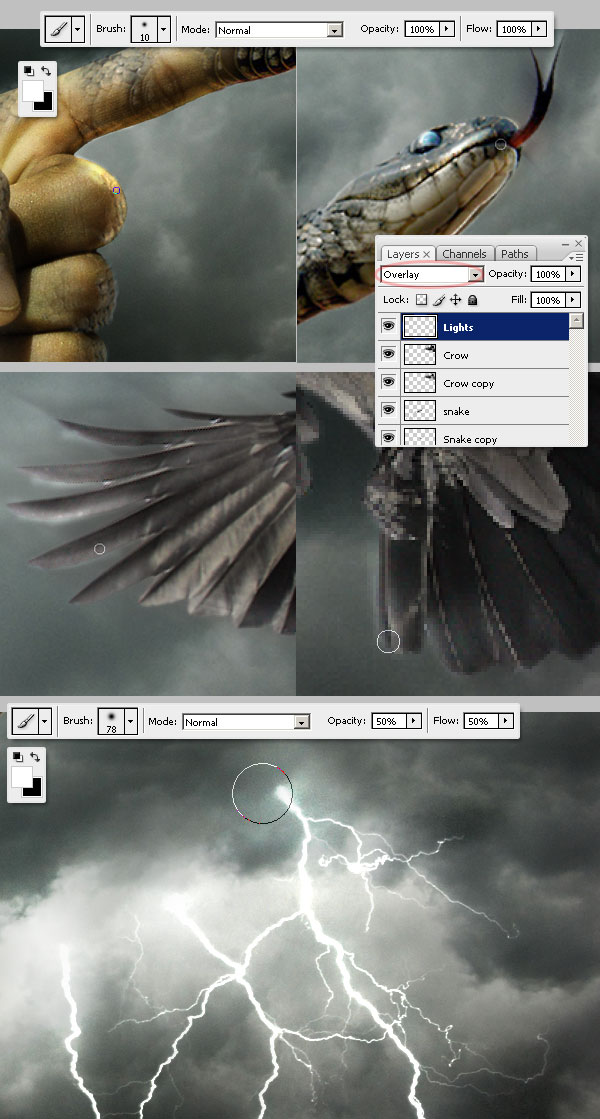
Step 22
Duplicate the "Bolts" layer and distort the copies as you want. Also, you can blur the copies to increase the distance sensation. Remember paint the respective white lights on each bolt within the "Lights" layer.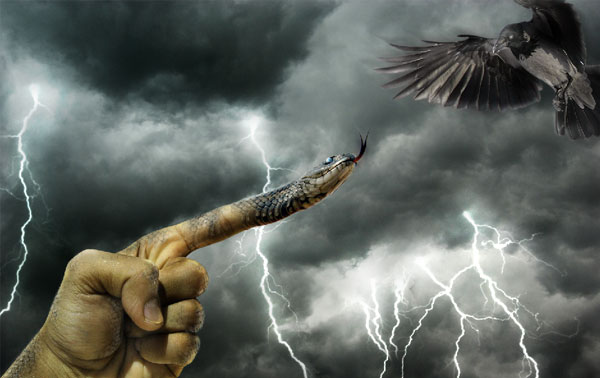
Step 23
Since the original plan is to create a rainy scene, let's add the rain!. Start creating a new black layer on top of the layers palette.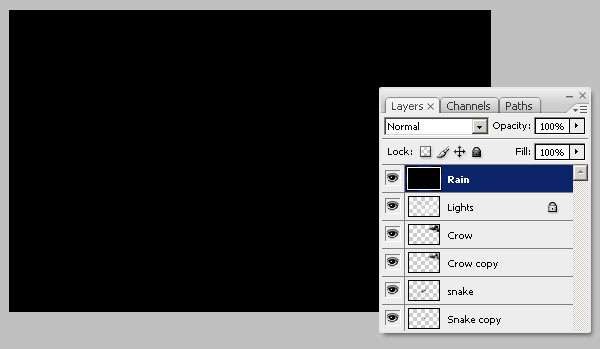
Step 24
Following go to Filter > Noise > Add Noise and add a 400%, Gaussian, Monochromatic noise to the "Rain" layer.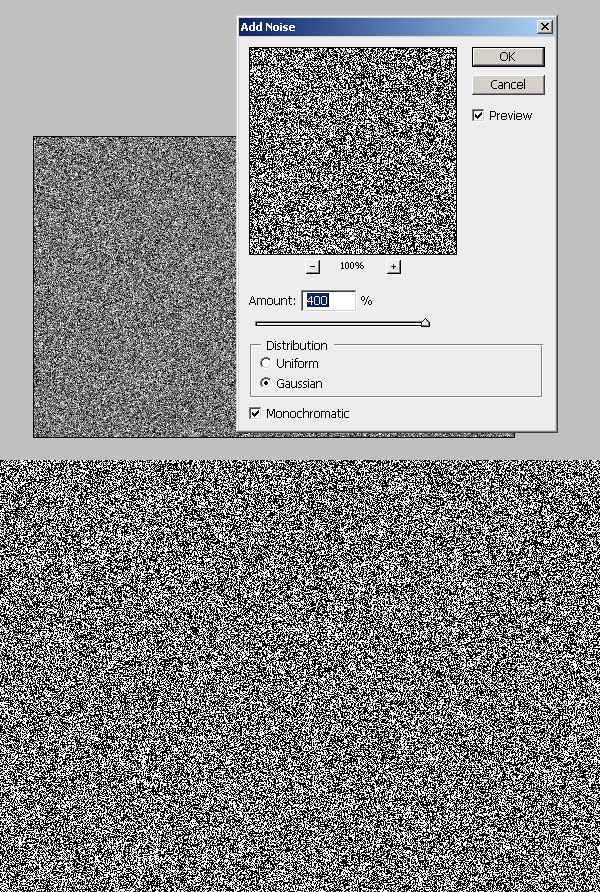
Step 25
Now Apply a Filter > Blur > Motion Blur (Angle 90º, Distance 100px) to the "Rain" layer.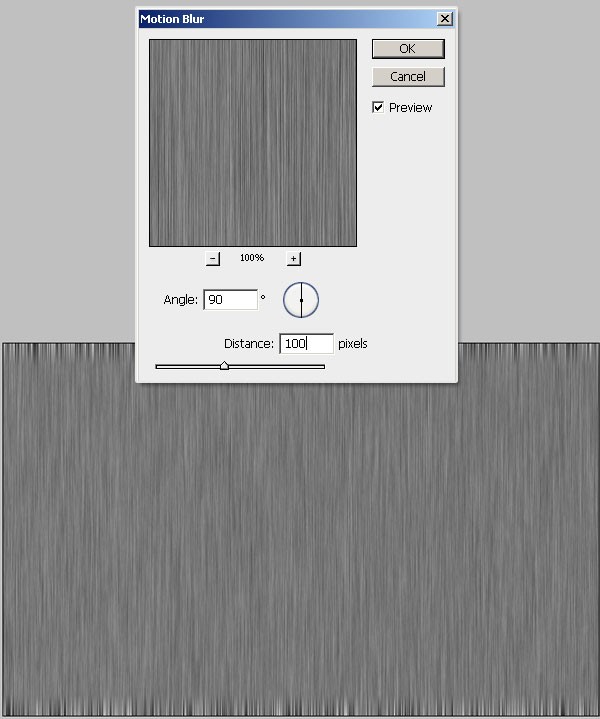
Step 26
Actually the main trick to make the rain looks real is to change the perspective. For this, Free Transform the "Rain" layer and try to get something like the image below.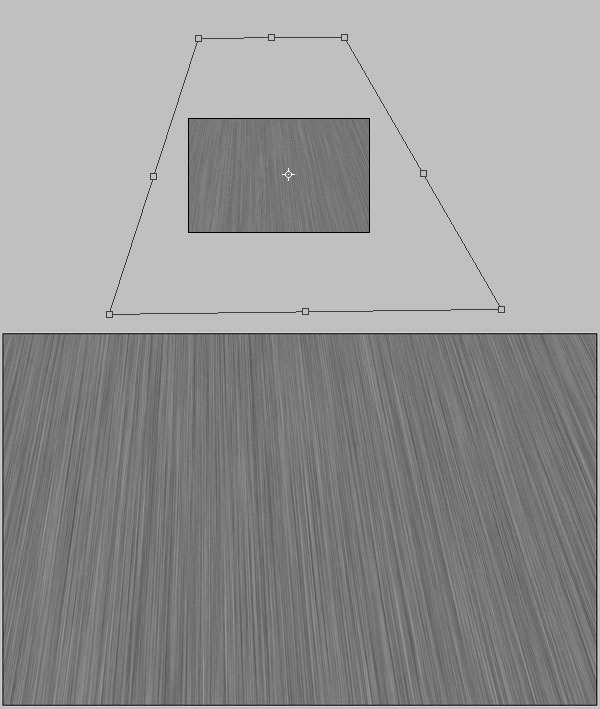
Step 27
Now adjust the Levels as shown below.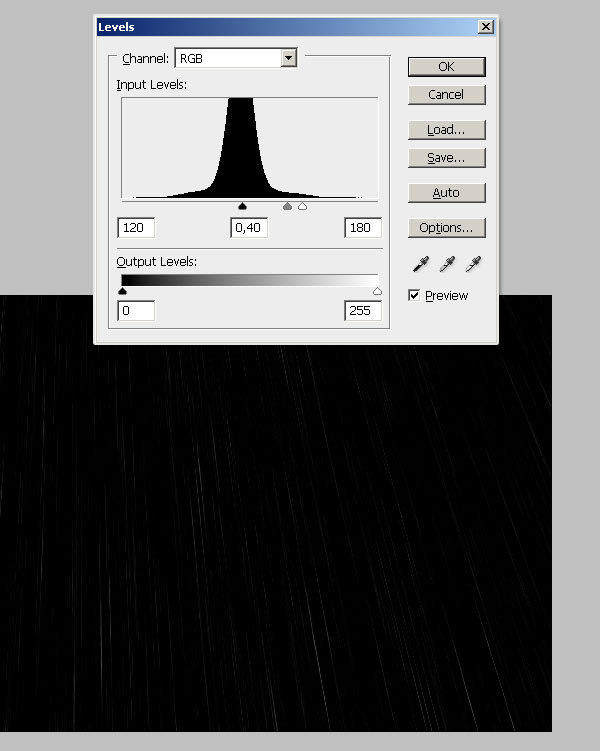
Step 28
To finish the rain, change the "Rain" layer's Blending Mode to Screen. That's it! a quick and realistic way to get rain from scratch in six steps. But it still needs more realism, let's go forward.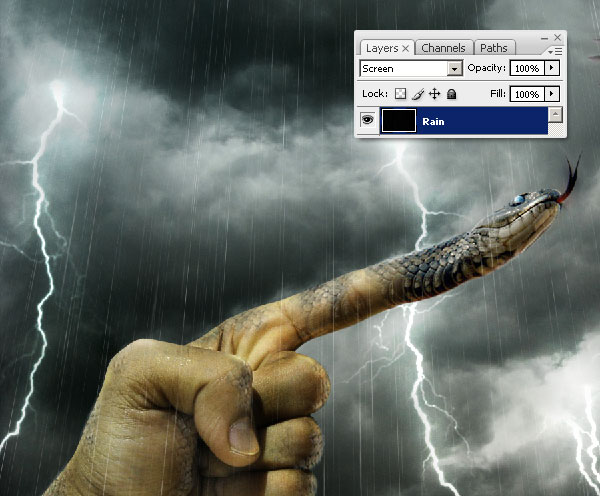
Step 29
Duplicate the "Rain" layer, select the copy, distort it a little bit (you can use the Free Transform tool) and go to Filter > Blur, that will increase the perspective sensation and deep level.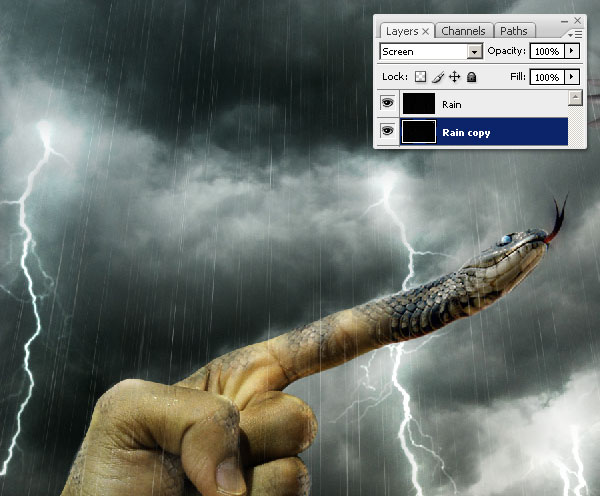
Step 30
The water drops must splash when it reaches an object, for this download this Water Brushes set, and choose one of the splash brushes (in this case number "680") and paint a white (#FFFFFF) splash into the "Splash1" layer. Distort it and make it really small.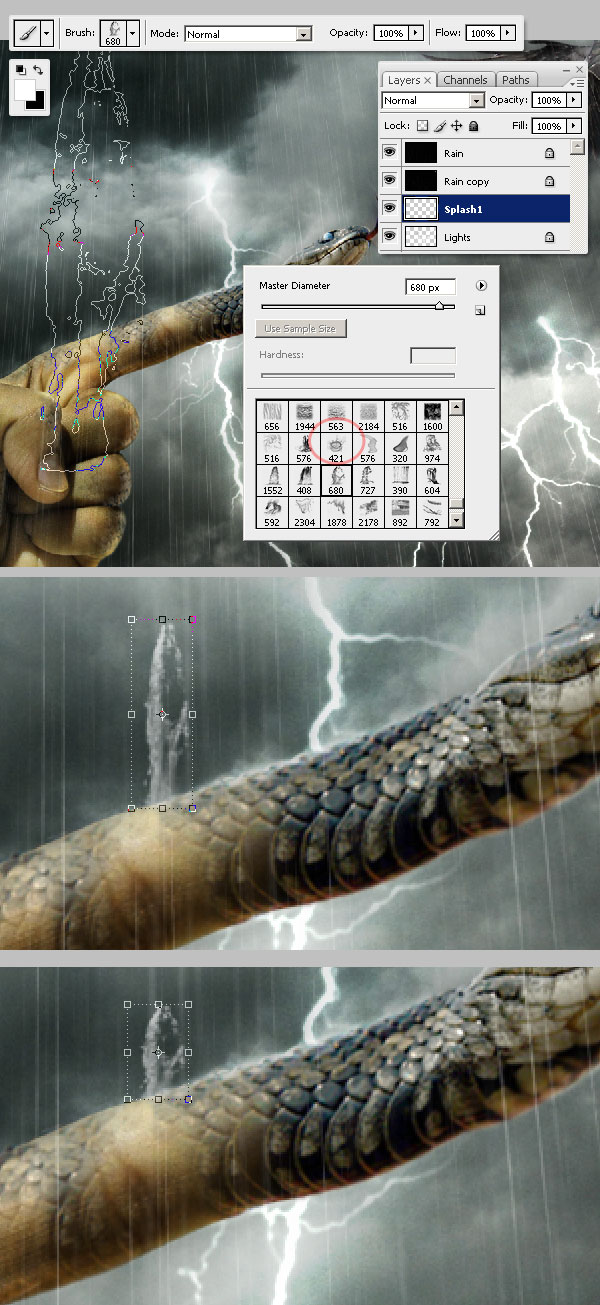
Step 31
Now add some tiny drops to the splash, paint some drops using the brush number "617" and delete some of them.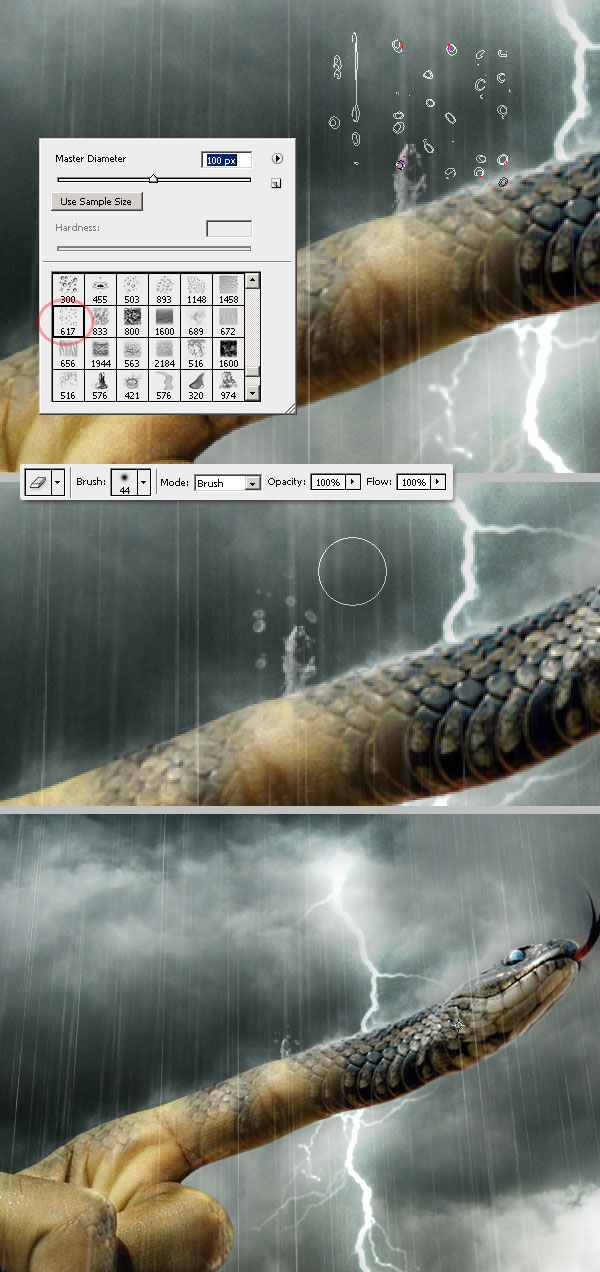
Step 32
Add more drops here and there especially around crow's wings, also add more splashes over the hand if you want to. Our design is pretty wet actually, we're close to finish it.
Step 33
Using the marquee tool, select all the canvas, then Feather the selection around 100px and invert it. Fill the selection with black (#000000) into a new layer named "Dark border" above all the other layers. Finally, change its Blending mode to Soft Light.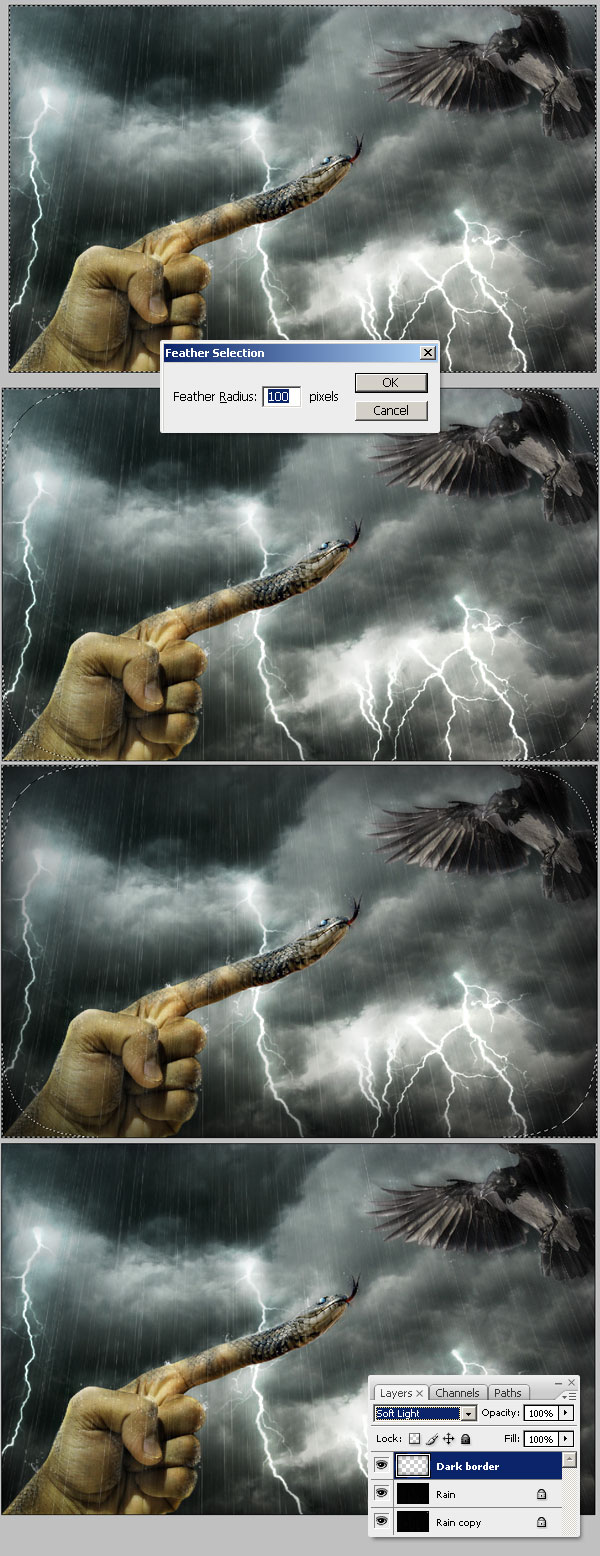
Step 34
As a final detail, add a new Adjustment Layer > Gradient Map above all the other layers. Then change the Blending Mode of the Gradient Map to Overlay and its Opacity to 35%.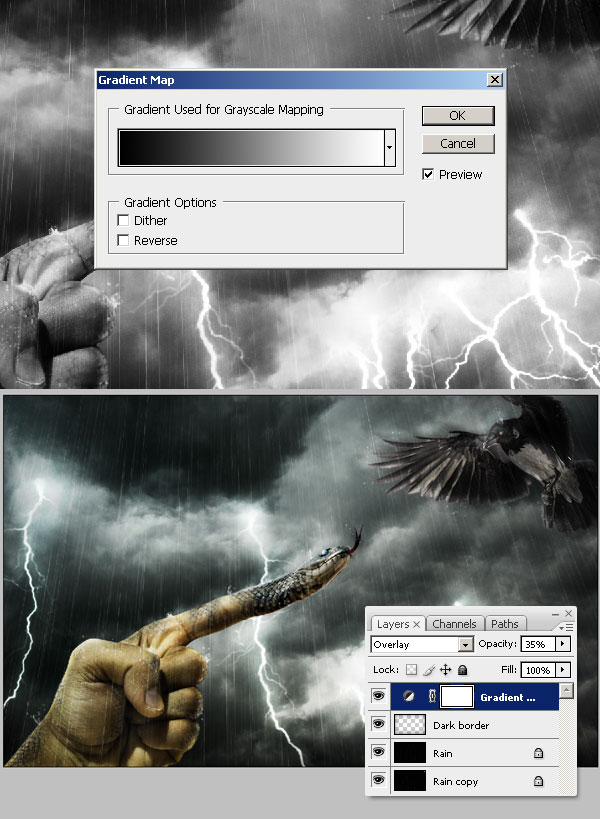
Conclusion
And we're done! A surreal eye catching rainy scene. Hope you like it! Click the screenshot below to view the full-size image.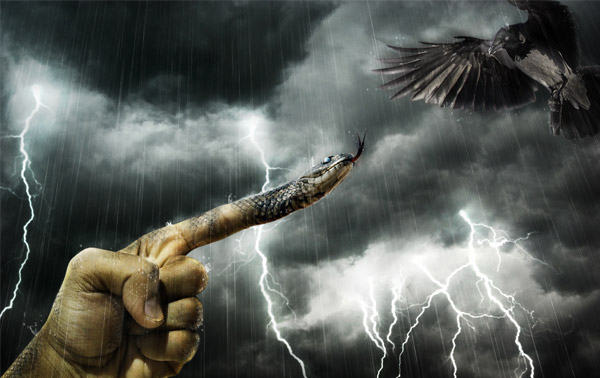
No comments:
Post a Comment